Showing posts with label Christmas. Show all posts

Friday, 2 January 2015

Review of The Make Your Own Hamper & A Natural lined Storage Basket From The Basket Company ©.

My review of the make your own hamper kit and the natural lined storage basket available from The Basket Company © 

Good Morning readers, 
                                       I was delighted to have a chance to review a couple of items from The Basket Company © they have a wonderful collection of baskets for every occasion.

There are picnic baskets,pet baskets,storage and laundry baskets and many many more in various sizes and designs.


I loved the  make your own hamper kit it contains all you need included in this kits is a...
  • Double steamed willow basket (L 40cm x W 30cm x H 11cm)
  • Ivory coloured wood wool for the base
  • Heat shrink bag
  • Ivory bow
  • Gift tag                              


So the hardest thing you have to do is choosing what to put in there as you can see i decided to make a pamper hamper at a fraction of the price.


They have a useful you tube clip Here showing you how to make your hamper.

D.I.Y

Here is how to use your kit from start to finish.


Step one Place the straw in the basket and pull it out to fit.
Step one.

Step two Fill with what ever you want placing the bigger/heavier items in the middle and then the smaller/lighter items around the edges.
Fill with what ever you want.

Step three Place the hamper inside the bag so the opening is up the top then scrunching the middle tape it in place.


Step four Get the hair drier and on a medium setting hover it lightly over the sides then the top to shrink it into place,(DON'T stay long in one place or go to close as you will melt the bag!) 
Remember not to close!

Step five Make the bow by holding the two thin pieces and pulling to magically create a stunning bow,Then tie in place.


Oh pretty.


Step six Using a pair of scissors run one side of then down the straight bit of ribbon to create a tumbling curl,


Step seven Add the tag and then you are finished.


A stunning home made hamper and a unique gift for anyone.
The possibility's are endless as to what kind of hampers you can make and these D.I.Y kits from The Basket Company are just the thing.

They can be reused (unlike the shop brought thin basket's that break quickly these are made to last) and would look fantastic on any dinner table filled with fruit or simply for storage,
The basket is handmade and sturdy so will last for many years to come.


Next i reviewed the Natural Lined Storage Basket you can see the quality of this  natural Willow handmade basket its available in various sizes and is lined in ivory fabric that is washable.
It is well made and would not look out of place in any part of the house. 
The liner,
Well made.


And so that is it my review with thanks to The Basket Company for providing the baskets used today please check out there page's below.
The Make Your Own Hamper is priced at £15.00 Here and the Natural lined Storage Basket is reduced to just £5 Here.
They offer free delivery on all orders over £50 or £4.95 for under £50.
To view there whole range click Here.
The Basket Company © Twitter Here
The Basket Company © Facebook Here.
The Basket Company © Google+ Here.

Oh and before i go they have a sale starting this Monday 5th Jan but in the mean time you can get 15% off using code IZZY15 this is valid until 31/01/15 and can be used on more than one order so what you waiting for hop on over and take a look.

Thank you for taking the time to read my review,I hope you liked it if so please subscribe via blogloving or Google+.
Buster being a pest!
Till next time stay lucky.
Love Bella x


Thursday, 18 December 2014

Ginger Bread Christmas Cookies & Jam n Lemon Tarts.

Good afternoon all,
                               My Princess Molly-Joy decided to volunteered me to make the Christmas cookies for the whole of year 2 and with only one days notice i had my work cut out.So i decided to make ginger bread cookies as there quick and simple to make one handed.


First of all i got every thing i needed in one place so i didn't have to go rummaging in my baking cupboard.


Next i made the dough using my trusty Kitchenaid. The recipe is 
800g plain flour,350g brown sugar,200g butter.2 eggs (whisked),8 tbs golden syrup,3 tsp bicarb,3 tsp ginger powder.(or 2tsp of lazy ginger)
I whizzed the butter and sugar till fluffy then added the eggs VERY slowly. (stops it curdling.. add a tbs of flour if it does to bring it back)
Add the golden syrup (pop the spoon in a mug of hot water before hand then the syrup will slide off easy) and mix well.
Next i  sieved the flour,bicarb and powdered ginger (if using lazy ginger then add just with the last bit of egg) into the butter mix and then put it on fast speed for 4/5 minutes.
Next i turned the dough out and wrapped it in clingfilm and popped it in the fridge for 20 minutes. (makes the dough easier to use) 


                             Once out the fridge i cut it in to four (easier to use) then i rolled it out on a lightly floured worktop i kept them about 2cm thick so they would be crispy on the outside and nice and soft like cake inside.I could not find my gingerbread man cutter so my reindeer's were a no go. :( Luckily i had a star,stocking,tree and bell shaped cutter to hand and got stamping (to stop it sticking "dip" the cutter in a little icing sugar) 

Cutting out the stockings .


While they were cooking (180 for 8/10 minutes) i whipped up some puff pastry and made some strawberry and lemon tarts and popped them in the oven for the same time.(i used a bit to much jam in a couple oops)but they still look yummy. 

Ready to bake
All cooked and cooled.


Once the cookies are cold i got to work decorating them i did some in a thick fondant and rolled it out on some grease proof paper using the same stamper as the cookies.I stick them on using melted jam then left them to harden. 


yummy trees
I love these stars they were tricky tho!


 Stockings didn't come out right but still looked ok.


Twinkle Twinkle Little Star.
They are a deep purple in colour.
Next i dipped the remainder of the cookies into  fondant i had made by adding glycerin to normal  icing sugar,then sprinkled them with edible glitter and left them to dry.


Pink marbled bells.
I then added "snow" but they ran a bit but again still looked awesome,and the bells came out fab too.
Snowy top stockings.


So there you are my ginger bread cookies once they were dry (at stupid o'clock this morning) i packed them up ready for today's school party,(i forgot to a take a picture as i was knackered by this time)
When Princess Molly-Joy came home from school she said "Everyone loved our cookies and Josh and Mr Fox said they were 101% yummy" So i can only assume they liked them as Molly-Joy said there was none left (all 80 of them were ate).
I have warned Molly-Joy tho not to volunteer me again at short notice if was fun but stressful to do.
Thank you for getting this far and reading i do hope you liked my cookies.
Please subscribe to keep up to date on my ramblings.
Till then Stay Lucky. xx


P.s check out Victoria's Vintage page Here & the Ableskills page Here

My DIY Snowmen nails.

Good Afternoon Reader's,
                                                            Thank you for taking the time to come and look.As you know i am new to nail art and after my awesome success of my Santa hats i thought id try my hand at snowmen,(please remember i am a novice and this is only my second try.But with any luck ill have them mastered  by next year!! lol.Any way enough of my waffling let me show you...


                   Step 1.Get everything you need so you don't have to rummage in your box and ruin your nail's(i store my nail stuff in a old shoe box).


                       Step 2. I used a undercoat then proceeded with BarryM glitter, 


                       Step 3. I used a cotton dipped in Sinful White to make the head and body.


                         Step 4.  Again using BarryM  i gave each snowmen a bright red scarf.(think ill use a thinner brush next time.)             


                          Step 5. Using a black polish and a thin brush i gave each one a hat some button's,eyes and mouth. 


                            Step 6. Again using a thin brush i gave them a carrot nose.


                            Step 7 using  Andrea Fulerton sparkle and stripe white i sat each snowman on some snow and the while wet added the Andrea Fulerton glitter .And lastly using the gold Andrea Fulerton sparkle and stripe to create the scarf's "tassel's" and star's in the sky.
Once dried i used a topcoat to seal it.


                             And so you have it my DIY snowmen nail's.Yes i know they ain't brilliant but for someone who only just started out i think it looks ok.


                            Thank you for taking time to take a look.

                            Please subscribe for more reviews and nail news's.
                            Till then stay lucky.xx 

Tuesday, 16 December 2014

My Review Of The BarryM Gift Set.


Afternoon Readers,

                               I was lucky enough to win a awesome BarryM gift set from a re tweet competition over on BarryM's twitter page here


When the UPS man came i was overjoyed to see a huge red gift box with 30 of the most popular colour's including 10 Gelly's 4 Silk 6 normal nail polish and 10 awesome glitters that any nail lover would love to add to there collection.


I couldn't wait to try them out so i started using a undercoat and then set to work.
(This may take some time lol.)


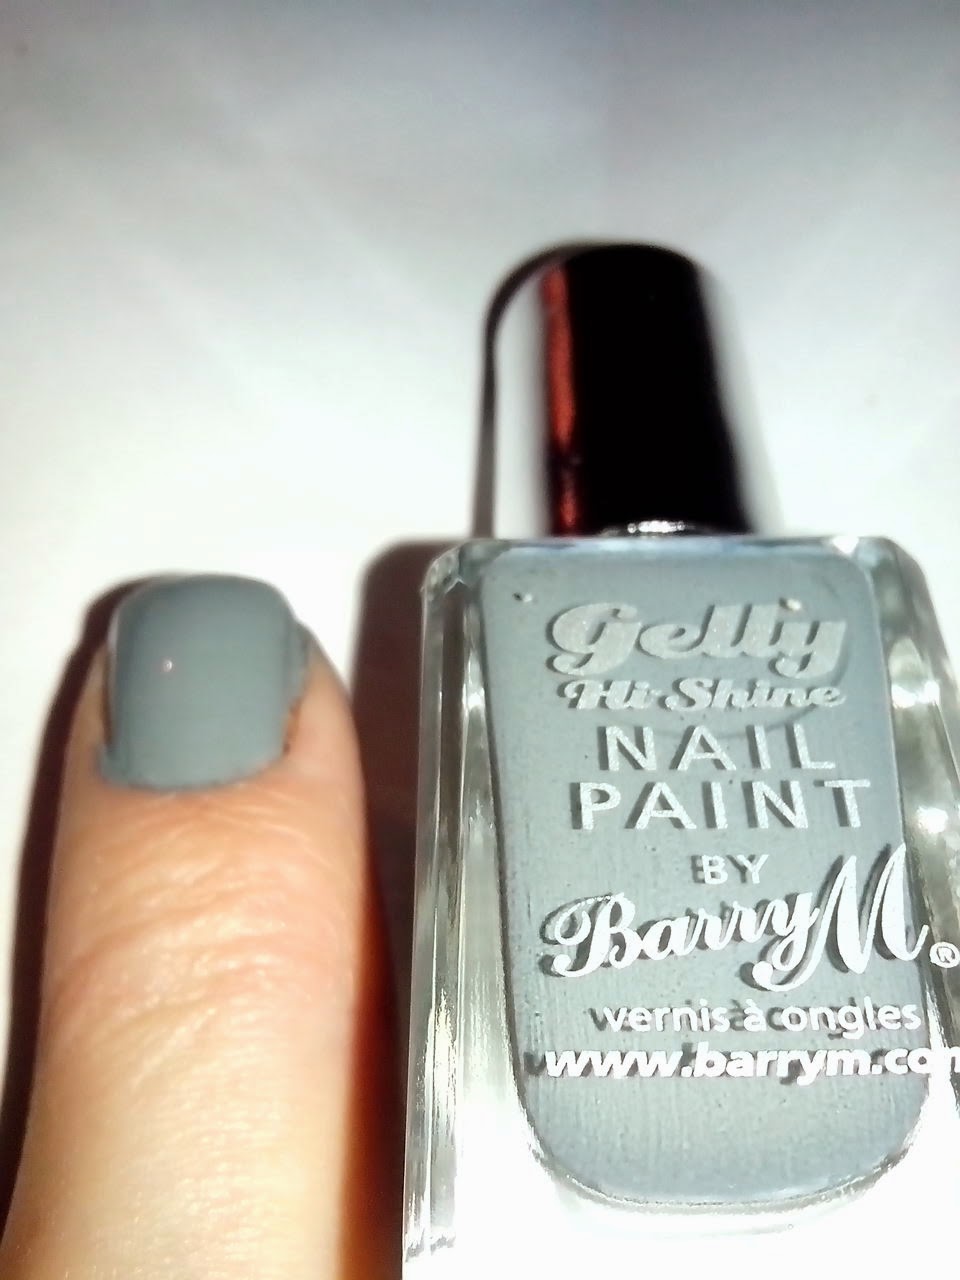
First up the Gelly Polish,You must prime and use a  undercoat as it may stain your nails but other than that i cant fault it.
The Gelly glides on and covers well first time leaving a streak free glossy finish that stays put all day and night with no chips,
I found using a top coat it lasted a few extra days. 
There are some stunning shades to choose from as you can see from the pics. 


Next is the silk polish it seams to dry quicker than normal polish and as you can see it leaves a matt effect.And i think it looks fantastic,It is not hard wearing so a topcoat is a must.


Pretty dont you think!


Now were on to the main BarryM range.Big bold colours clean and fresh and a colour for any occasion as you can see in these next set of pictures.


And lastly the stunning glitter range (oh sparkly) Various coloured glitter that sparkles and shines in the light,Perfect for christmas parties.


So there you have it the BarryM gift set.
Available Here Priced at £89.99.
A must for any nail fan young and old.
I really loved reviewing this set and i shall be updating it as and when as ive still got to try them all again and see how they stamp! So please watch this space.
Till then thank you for reading,
Wishing you all love luck and light.